Panel Meter Clock Version 2.1
Introduction
My father has been a lifelong Ham Radio Operator with a fondness for anything with a panel meter. After seeing the “Trinket Powered Analog Meter Clock” by Mike and Anne Barela on the Adafruit website I knew I had to make one like it to give to my Dad for his 80th birthday.
I used OpenSCAD to create a 3D printable case and used a small protoboard to connect an Arduino Pro Mini, a pair of tactile push buttons and couple of headers for a DS3231 Real Time Clock (RTC) module and a pair of analog 5v panel meters. I wrote a quick Arduino sketch to read the current time from the RTC module and drive the panel meters using two Pulse Width Modulation (PWM) pins. I used the MeterBasic program from Tonne Software to create custom meter scales for the Hour and Minute meters. It worked well and was a well-received birthday present.
After a few minor changes, I built another clock for myself and documented the process then published the files on MakerBot’s Thingiverse A couple of years later I received an email from someone who was building the clock and was having issues printing the meter scales. Changes in the Windows 10 printing system were causing misalignment of the text on the meter scales. I decided it was time to revisit the project make some updates.
To solve the issue with printing the meter scales, I turned to Inkscape. I modified the Knob Scale Generator plugin to create the new meter scales.
I have changed from using point-to-point wiring on protoboards for my projects to using EasyEDA to design Printed Circuit Boards (PCB) and JLCPCB to manufacture them. JLCPCB also offers Surface-mount technology (SMT) assembly services allowing me to use components that many people would not feel comfortable trying to hand solder. This enabled me to create an Arduino Leonardo compatible PC board with a USB interface that attaches directly to the back of the panel meters reducing the amount of soldering required and making the clock much quicker and easier to assemble.
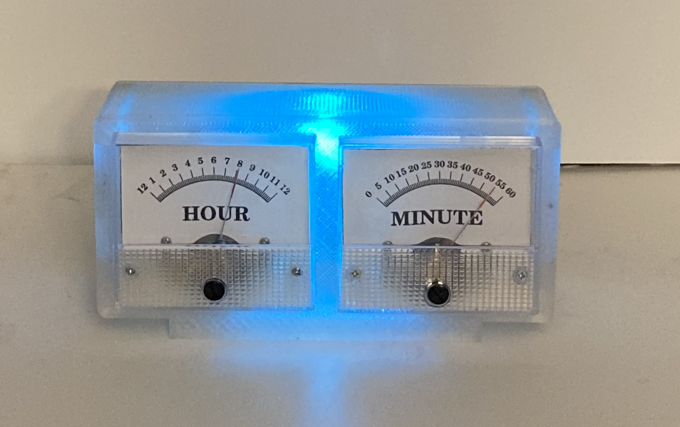
The PC board has a NeoPixel intended to backlight the meters, but it does not work as well as I would have liked. I’ll use two or more in the next version. Until then, I decided to print a translucent case and use the NeoPixel for color effects. The new panel_meter_clock2_1 sketch has four color mode settings; Fixed color (or none), Color Wheel, Sky, and Sun. The Sky and Sun modes vary the color and intensity of the NeoPixel based on the current position of the sun. The solar position calculations are based on formulas used in the NOAA Sunrise/Sunset and Solar Position Calculator Excel spreadsheet. The Sky and Sun color calculations are from dbrown2k’s Sunrise_clock repo.
The clock can be configured using a serial terminal program connected through the USB serial port.
All files need to make the clock are available in my Panel Meter Clock GitHub Repo. The following pages are the assembly instructions for version 2.1 of the Panel Meter Clock.
- Panel Meter Clock Version 2.1
- 1. Video of Assembly
- 2. Parts List
- 3. Print the Case
- 4. Replace Meter Scales
- 5. Assemble Clock PC Board
- 6. Programming
- 7. Final Assembly
- 8. Configuration
- 8.1. ? : Show help
- 8.2. h : Hour meter adjust
- 8.3. m : Minute meter adjust
- 8.4. i : Increase PWM
- 8.5. d : Decrease PWM
- 8.6. n : Next hour/minute PWM
- 8.7. p : Previous hour/minute PWM
- 8.8. c : change color mode
- 8.9. s : Sweep minutes
- 8.10. t : Set time
- 8.11. l : Set location
- 8.12. w : Write to EEPROM
- 8.13. q : Quit menu